All Categories
Featured
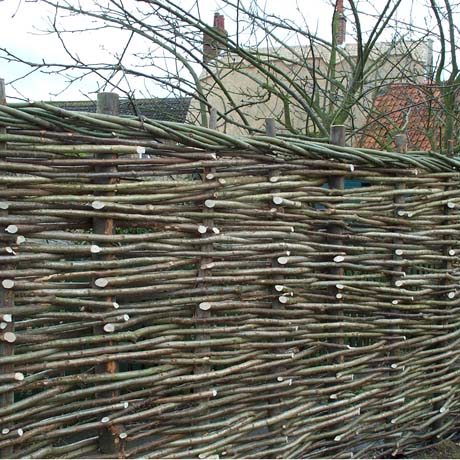
A leaning or harmed fence post can be a major aggravation, influencing the stability of your whole fencing. Whether as a result of weather, aging, or exterior pressure, a leaning fencing article can cause a drooping or irregular appearance that not only jeopardizes your fencing's stability yet likewise its safety. Luckily, fixing a leaning or harmed fence post is a convenient DIY task. Right here's exactly how to take on the issue and restore your fence to its original problem.
![]()
Dirt disintegration: Gradually, the dirt around the base of the blog post might deteriorate due to hefty rain or flooding, triggering the article to lean. Rot: Wood fencing articles can rot at the base because of long term exposure to dampness, leading to instability. Pressure: External pressures such as wind, the weight of the fencing, or leaning branches can create the article to lean or break. You can choose the most ideal solution. when you have actually identified the kind of damages.
Alternative 1: Concrete: Prepare a bag of quick-setting concrete mix. Adhere to the supplier's directions for the correct water-to-mix ratio. Pour the concrete around the base of the message, loading the opening. See to it the post stays degree as the concrete sets. It normally takes regarding 20-30 minutes to start establishing, yet it's finest to leave it uninterrupted for 24-hour for full treating.
Alternative 2: Crushed rock: If you like a quicker, less long-term repair, you can utilize crushed rock rather of concrete. Pour crushed rock around the base of the article, ensuring it's packed firmly. This option allows for far better drainage around the base, which can stop more rot and leaning in the future.
![]()
Action 1: Get rid of the busted or decayed blog post by loosening the concrete or crushed rock around it utilizing a sledgehammer or article puller. Step 2: Once the message is removed, prepare the hole for the new blog post by ensuring it's deep enough to accommodate the brand-new blog post and the material for reinforcement (concrete or gravel) Step 3: Install the brand-new post in the red, making certain it's degree and straightened with the various other blog posts. Step 4: Adhere to the same actions for safeguarding the brand-new message as detailed earlier, either making use of concrete or gravel for security. 6. If Needed), strengthen with Braces (. You can make use of an angled brace to hold the blog post upright until the concrete fully sets or as a permanent support. Connect one end of the brace to the top of the post and the other end to a close-by fencing message or strong assistance.
![]()
Verdict. Repairing a leaning or harmed fence blog post is a straightforward yet fulfilling task that can recover your fencing's stability and look. By following these actions and dealing with the origin of the issue, you can make certain that your fence continues to be upright and safe for years ahead. Whether you're aligning a leaning post or changing one that's past repair work, taking care of your fencing messages quickly will assist you preserve the honesty and safety and security of your fencing.
- Assess the Damage. Prior to you begin fixing the leaning fencing message, it is very important to examine the damages completely. Identify whether the post is simply leaning or if it's cracked, decayed, or damaged at the base. Usual reasons for leaning fencing posts include:

Dirt disintegration: Gradually, the dirt around the base of the blog post might deteriorate due to hefty rain or flooding, triggering the article to lean. Rot: Wood fencing articles can rot at the base because of long term exposure to dampness, leading to instability. Pressure: External pressures such as wind, the weight of the fencing, or leaning branches can create the article to lean or break. You can choose the most ideal solution. when you have actually identified the kind of damages.
- Dig Around the Base of the Message. To take care of a leaning article, you'll need to reveal the base. Begin by excavating around the base of the blog post with a shovel, developing a hole about 12 inches large and 18 to 24 inches deep. Be careful not to damage the post even more as you dig. You intend to make certain the dirt bordering the blog post hangs enough to permit for repositioning or extra support.
- Align the Post. If the post is just leaning and not drastically damaged, you can correct it before safeguarding it again. Make use of a level to make sure the message is lined up properly, ensuring it's vertical. You may need an assistant for this step to keep the message in location while you include assistance.
- Include New Concrete or Gravel. To strengthen the message and stop future leaning, you will certainly need to include new concrete or gravel to the base. Below's exactly how to do it:
Alternative 1: Concrete: Prepare a bag of quick-setting concrete mix. Adhere to the supplier's directions for the correct water-to-mix ratio. Pour the concrete around the base of the message, loading the opening. See to it the post stays degree as the concrete sets. It normally takes regarding 20-30 minutes to start establishing, yet it's finest to leave it uninterrupted for 24-hour for full treating.
Alternative 2: Crushed rock: If you like a quicker, less long-term repair, you can utilize crushed rock rather of concrete. Pour crushed rock around the base of the article, ensuring it's packed firmly. This option allows for far better drainage around the base, which can stop more rot and leaning in the future.
- If Required), replace the Article (. It may be best to replace the message entirely if the article is drastically harmed or decayed at the base. This procedure entails getting rid of the harmed article, which can be challenging if it's deeply embedded in concrete or gravel. Here's exactly how to change it:
Action 1: Get rid of the busted or decayed blog post by loosening the concrete or crushed rock around it utilizing a sledgehammer or article puller. Step 2: Once the message is removed, prepare the hole for the new blog post by ensuring it's deep enough to accommodate the brand-new blog post and the material for reinforcement (concrete or gravel) Step 3: Install the brand-new post in the red, making certain it's degree and straightened with the various other blog posts. Step 4: Adhere to the same actions for safeguarding the brand-new message as detailed earlier, either making use of concrete or gravel for security. 6. If Needed), strengthen with Braces (. You can make use of an angled brace to hold the blog post upright until the concrete fully sets or as a permanent support. Connect one end of the brace to the top of the post and the other end to a close-by fencing message or strong assistance.
- Normal Maintenance. Once the leaning blog post is taken care of, make certain to regularly inspect the messages for indications of damages or leaning. Check the condition of the wood or various other products used in your fence to stop future issues. If you live in a location vulnerable to heavy rainfall or soil erosion, take into consideration including additional assistance to your articles by utilizing concrete or crushed rock and making certain appropriate drainage around the blog posts.
Verdict. Repairing a leaning or harmed fence blog post is a straightforward yet fulfilling task that can recover your fencing's stability and look. By following these actions and dealing with the origin of the issue, you can make certain that your fence continues to be upright and safe for years ahead. Whether you're aligning a leaning post or changing one that's past repair work, taking care of your fencing messages quickly will assist you preserve the honesty and safety and security of your fencing.
Latest Posts
Take Advantage of Limited-Time Auto Repair Deals in Chicago at Montclare Auto Repair
Published en
1 min read
Improve Your Home's Outside with Weathercraft's Siding Solutions
Published en
1 min read
Unlock Your Financial Partner at WyHy – Key Advantages for Your Financial Success
Published en
1 min read
More
Latest Posts
Take Advantage of Limited-Time Auto Repair Deals in Chicago at Montclare Auto Repair
Published May 28, 25
1 min read
Improve Your Home's Outside with Weathercraft's Siding Solutions
Published May 27, 25
1 min read
Unlock Your Financial Partner at WyHy – Key Advantages for Your Financial Success
Published May 25, 25
1 min read